
6 minute read · Colour and room decisions
For halls, stairs and landings, choose a colour scheme along the whole route rather than from one bright wall beside the front door. Test the entrance, stair turn and landing, then decide how doors, skirting, handrail and any existing panelling relate.
A Dundalk hallway can connect several rooms and very different light levels. The same shade may look different upstairs and downstairs. That is a reason to test across the route, not automatically a reason to choose a different colour for every section.
Follow changing light through the stairwell
Walk the route at the times it is normally used. Note daylight at the entrance, any stair window and darker landing sections. Check evening fittings too. A sample beside glazed front-door panels may look brighter than one around the stair turn.
Use the same labelled sample at each level. Keep an observation sheet with entrance daylight, stair turn, landing daylight and evening light. Note what changes in ordinary language: too yellow, greyed, stark against the door or deeper than intended.
Manufacturer Little Greene discusses differences caused by orientation and changing light. In a stairwell, multiple light sources and connected spaces make a physical route test particularly useful. Do not expect a phone photograph of one landing to predict the whole scheme.
Coordinate adjoining rooms and trim
View the hall with the usual doors open. Identify the room colours most often seen together. You can use a related hall shade as a connection or a deliberate contrast that separates the rooms. Matching every room is not necessary.
Map the trim: front-door interior, internal door faces, architraves, skirting, stair strings, spindles and handrail. Do not assume all stair components are to be painted. A retained timber handrail may be an important anchor for the palette.
Decide where colours change on doors and reveals. A double-sided door colour needs a clear boundary and a surface list. These details are easier to settle before work than after two adjoining room schemes have been approved independently.
| Route position | Comparison | Decision it resolves |
|---|---|---|
| Entrance | Wall sample against front door and floor | How the first view relates to fixed materials. |
| Bottom stair | Panel or skirting colour with stair trim | Whether the lower scheme continues up the flight. |
| Stair turn | Same sample in reduced daylight | Whether the depth remains acceptable. |
| Landing | Sample beside bedroom doorways | Connection with adjoining rooms. |
| Evening route | Normal fittings at all levels | Whether the complete scheme works after dark. |
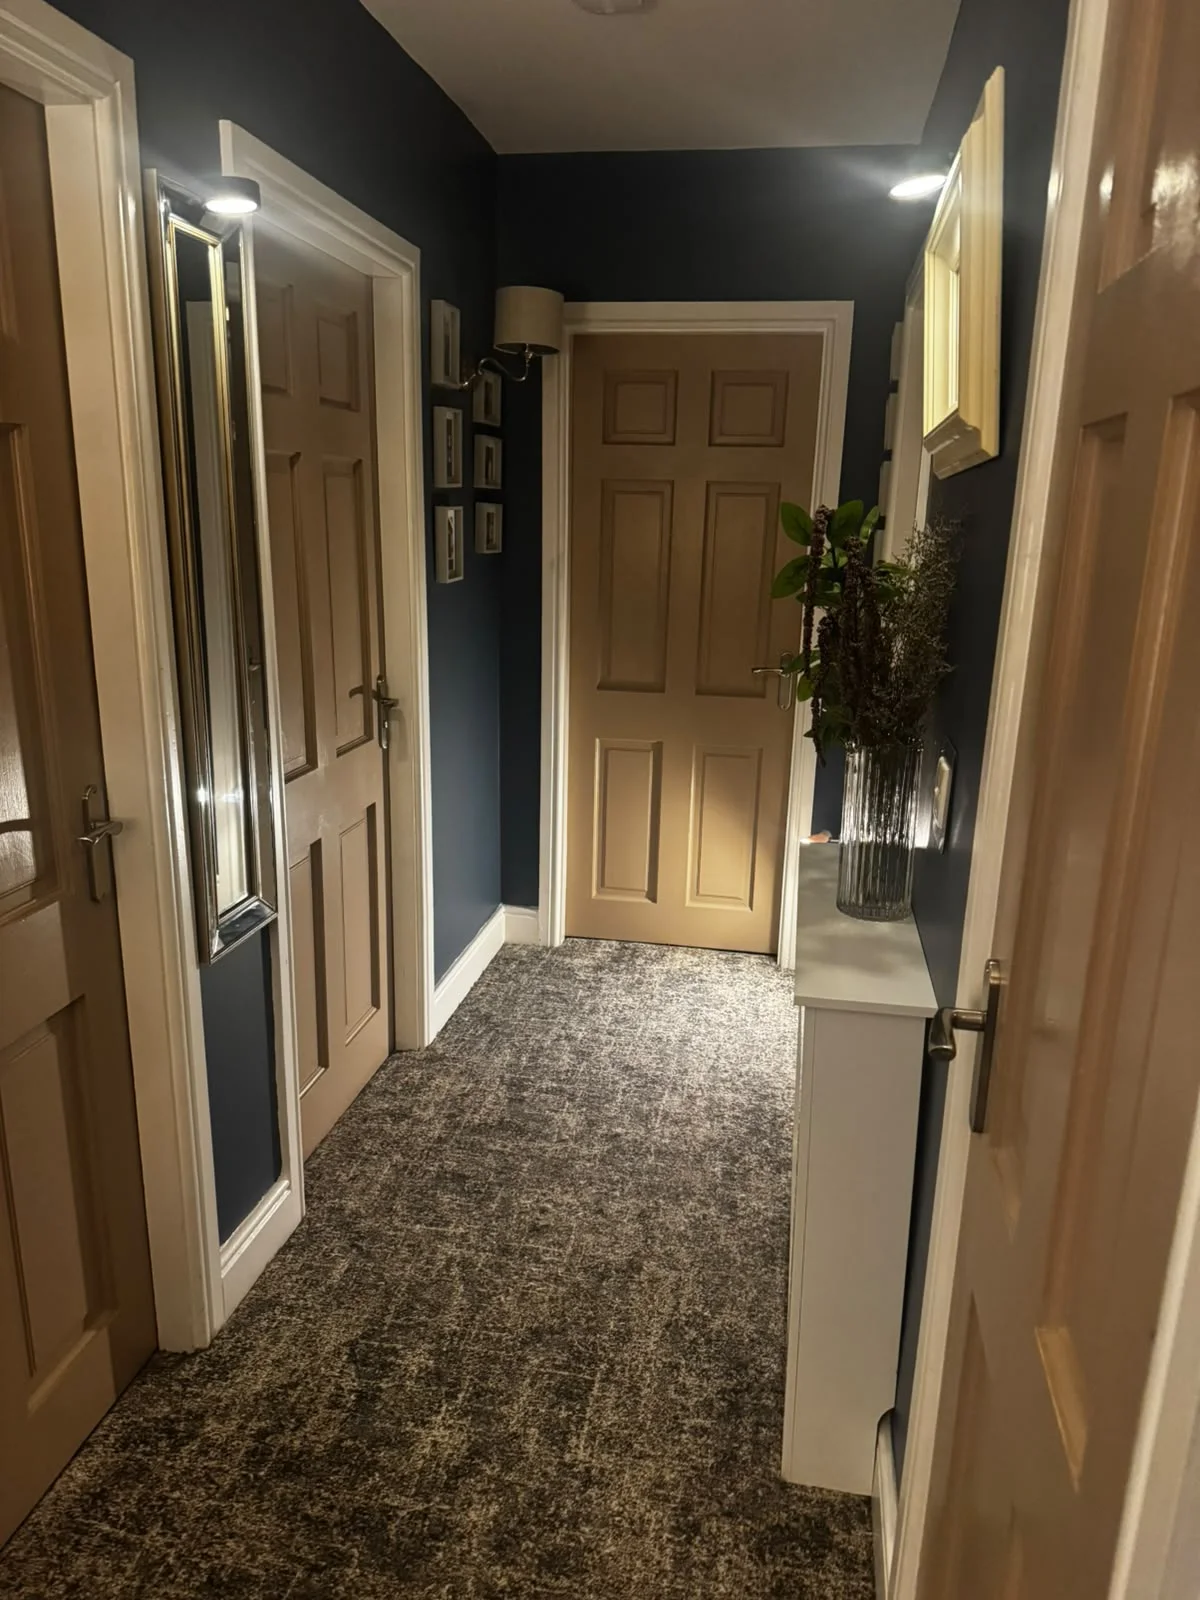
Test samples at more than one level
Try two or three purposeful options: a pale connecting neutral, a mid-tone related to the floor or stair materials, and a stronger lower-wall or panel colour if you want contrast. Avoid comparing a separate set of unrelated shades on every floor.
Place samples beside actual trim, not in the centre of an isolated wall only. A white door can change how you read an off-white wall. Where panels and upper walls differ, hold both colours together at the rail height and check the stair transition.
Assess dried physical samples under the intended lighting. A sample product may not have the final sheen, so confirm the actual wall and trim finishes before treating the match as complete. Record exact brand, product and colour reference for each surface.
Compare three colour relationships
One approach is continuous wall colour with contrasting trim. This makes the doors and stair detail clearer. A second approach uses related wall and trim colours, reducing visible breaks. A third keeps the upper wall quieter while existing panelling or a lower area carries stronger colour.
In a hypothetical hall with a warm floor and retained timber handrail, a pale upper wall and mid-tone panels might connect the two levels while leaving the handrail distinct. If the landing has little daylight, test whether that panel shade feels too deep there before continuing it automatically.
The comparison should include maintenance expectations and surface suitability. Colour continuity does not mean a single paint product can cover plaster, previously painted timber and MDF. Sheen and preparation still need to match the actual substrates.
Use photographs without inventing specifications
Completed hallway photographs can show useful relationships: where colour changes, which surfaces were painted and how trim meets the wall. They cannot reliably reveal a precise paint code. Camera exposure, light and screens all affect the image.
Where an approved project photograph appears here, use it as evidence of visible painting work only. Do not infer who fitted panels, the product brand or an exact colour unless those details are separately verified. If you want a similar result, test physical samples in your own hall.
Our panelling styles guide compares profile and finish relationships. For the wider scope and access questions, read hall, stairs and landing painting. The colour plan and practical work plan should be discussed together.
Prepare the enquiry around surfaces and access
List walls and ceilings by level, then add doors, skirting, existing panels and specific stair details. Mention worn edges, cracks, staining and access restrictions. If another trade's work is still outstanding, include that information before discussing the finish.
A hall remains a route through the home. Discuss household access and any essential timing rather than assuming it can be treated like an empty spare room. The appropriate work arrangement depends on the actual property and scope.
For interior painting in Dundalk and nearby areas, send your location and photographs of every level. Photos start the conversation; a visit may be needed. Include the favourite sample and the position where it looks least successful so the intended result is clear.
Questions before you decide
Should upstairs and downstairs use exactly the same shade?
They can, but test that shade in both places first. Different light may be acceptable within a continuous scheme, or you may prefer related tones with a deliberate transition. Decide from the full route rather than trying to make separate photographs look identical. Record the change point if there is one, including door reveals and stair returns, so the intended scheme can be followed clearly.
How do I choose around a timber handrail I want to keep?
Treat it as a fixed material and compare samples beside its actual finish. Include the floor, since the two timber colours may differ. The panels or trim can relate without being an exact brown match. State explicitly that the handrail is retained unchanged, and do not assume a painting enquiry includes stripping, staining or replacing it. Check the relationship at more than one level.
Can a darker lower wall hide everyday hallway wear?
It may change how some marks are noticed, but it does not guarantee fewer visible scuffs or easier cleaning. Choose a suitable product by its actual performance and care instructions, and consider where bags, furniture or hands contact the wall. Test the darker colour under landing light too. A practical finish and a clear maintenance record matter alongside the colour choice.
Interior painting: discuss your surfaces and scope. Contact the team with your area and photographs.